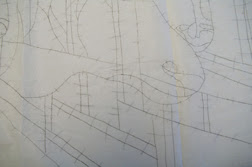
My quilts always begin with a fairly lengthy design process in which I start by making sketches of the subject matter.
Drawing helps me to familiarise myself with the subject. It also enables me to churn over various design ideas in my mind and on paper. Keeping a visual diary of this process is very important to me. Many times I refer back to earlier diaries and drawings - for inspiration or for reference, or purely for enjoyment!In my sketching process I generally begin with accurate, realistic drawings of the subject, before proceeeding to more simplified, stylised or abstract interpretations which lend themselves better to being worked in fabric. For my 'Eucalyptus' quilts, the final designs where all drawn up on computer using a Computer-Aided Design program. I found this helpful for achieving smooth seam lines and for avoiding getting carried away with too much detail in the piecing. Also, having the design on the computer means that I can easily make the whole design larger or smaller if I feel this is necessary. More recently, for the more complex quilts involving children, the image is drawn up by hand and then scanned and traced using Adobe Illustrator, which gives me a full size image which can be scaled as required, and which can also be coloured digitally to give me a working plan for the quilt.
Whether the final design is computer-drawn or hand-drawn, I always work from a full-scale drawing of the quilt showing piecing lines. This full scale drawing is traced onto the 'sticky' side of thin iron-on interfacing. This interfacing becomes my working pattern. I add notch markings to all the seam lines to enable me to match the pieces exactly again down the track.
The next stage in the quiltmaking process involves cutting the interfacing into individual pieces and ironing each piece onto the correct colour fabric. I try to do this in small sections so that I only have to manage thirty pieces at a time rather than thousands.
Once a piece of interfacing is ironed onto the correct fabric I cut around it, leaving a seam allowance. It is not necessary for the seam allowance to be exact, because in the piecing stage I match the edges and notches of the interfacing rather than of the fabric. The interfacing remains in the quilt. I find this method the best way for me to achieve smooth and accurate piecing.
The cut pieces have to be arranged into position a bit like a jigsaw puzzle (this is why I try to work in small sections rather than cut out the whole quilt at once, although if I have room to lay out the whole quilt before piecing I will sometimes do this so that I can review the colours before its too late to change any of them).
Then the piecing begins. As with traditional piecing the pieces are placed right sides together. Curves are clipped where necessary, and using lots of pins, the notch markings on the interfacing pieces are carefully matched. By stitching exactly on the edge of the interfacing I should have a perfect seam!
There is some limitation as to how tight the curves can be to still look neat. The whole quilt is pieced together in this manner. Sometimes it is necessary to stitch half a seam to began with and then come back to the rest of it later after more pieces have been added. I love this piecing stage of the quilt. I find it very therapeautic and it is so much fun to see the quilt take shape.
After the quilt top is ironed and the sandwiched with wadding and backing fabric, the next major stage is the quilting. I do all my quilting by machine, almost entirely using free motion stitching. I believe the quilting is a very important part of the quilt, and try to make my quilting designs relevant to the pieced images or subject. I also like to add various levels of interest if possible, like including embroidered images in the background. I also like to play with 'doodling' different continuous stitching lines into the background of the quilt to add texture and interest. Sometimes I draw some of the quilting lines onto water-soluble fabric first, for example if I quilt an image of a child into the quilt. The water soluble fabric is then pinned in place, and the quilt is stitched through all layers.
To begin and end a line of stitching I pull up the bobbin thread to the top of the quilt so that it doesn't get caught up in the stitching. At the end of the quilting stage the quilt is a 'hairy' mess of threads. These are tied together in pairs and threaded back between the layers of the quilt to give a neat finish to the quilting. This can take many hours and is my form of 'night time relaxation'.
Each quilt is completed with a hidden binding, a sleeve for hanging and of course a label.


